Mini design cycle
This project will have regular updates as the mini projects are completed. Mini projects for the house are the installation of a wood burning stove, under floor insulation and the construction of a cold store for fruit and veg. The garden projects are chickens and the integration of rain water harvesting systems, each project will complete a mini design cycle.
Wood burning stove.
Over view,
The house has a gas duel boiler running both the hot water and heating system.
The stove will be used as a quick heat source in the evenings when returning from work giving a quick heating boost to the main living space, burning waste wood and producing wood ash for use in the garden. This approach is carbon neutral the wood is burnt, more efficiently less wood is required which prevents waste and reduces heating bills.
The rational for a wood burner was based on several factors
Survey
The house was constructed in 1934 using open coal fires in the living room and 2 bed rooms with a cooking range and back boiler in the back room. The fire was in use at the time of purchase and the chimney has been swept each year and is in good condition. The fire opening was not original using a pre cast chimney adapter and marble hearth with a painted MDF surround.
The house has a gas duel boiler running both the hot water and heating system.
The stove will be used as a quick heat source in the evenings when returning from work giving a quick heating boost to the main living space, burning waste wood and producing wood ash for use in the garden. This approach is carbon neutral the wood is burnt, more efficiently less wood is required which prevents waste and reduces heating bills.
The rational for a wood burner was based on several factors
- Wood burning is carbon neutral (the carbon was captured from the atmosphere within the life time of the tree and will return to the atmosphere after burning making a closed cycle)
- The wood burner is more efficient burning cleaner and producing more heat, which in turn uses less wood.
- Producing no waste wood is good permaculture practice using waste saves the use of fossil fuels and heating bills.
- There is a primal feeling when sitting around a fire with the flames that has therapeutic effect, which I value.
- Building redundant systems gives multiple options and increases self reliance for the future as fuel cost raise.
Survey
The house was constructed in 1934 using open coal fires in the living room and 2 bed rooms with a cooking range and back boiler in the back room. The fire was in use at the time of purchase and the chimney has been swept each year and is in good condition. The fire opening was not original using a pre cast chimney adapter and marble hearth with a painted MDF surround.
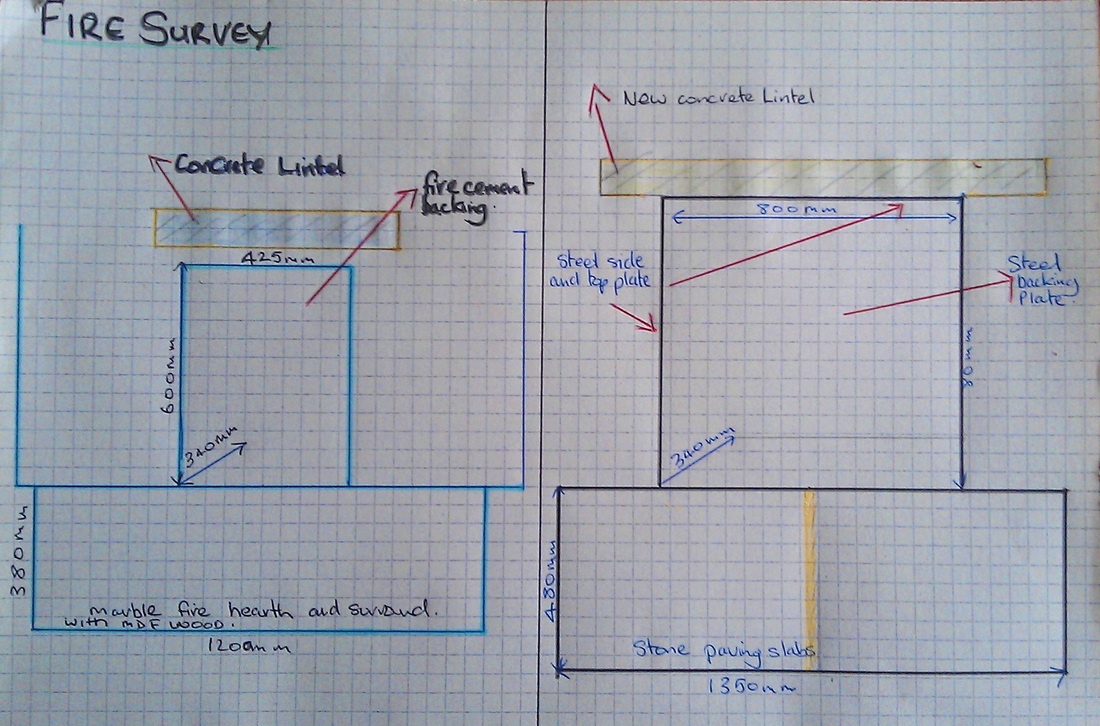
Fire survey
Design
The design
The design included
Working within the existing and chimney constraints
The chimney is fixed and allows for little adjustment on first inspection some alterations have been made which may cause a problems later.
Using regulation and guidelines for fire installation
The guidelines were accessed from the net and a guide produced by The Living woods magazine supplement on heating with wood. The regulation are clear and concise recommending using stove manufactures guidelines and common sense including the requirement for an air vent if the KW out put is over 5KW. The flue must not project more than 50mm over the throat plate to prevent carbon build up which could be a fire risk. The fire should be Defra approved if used in a smokeless zone.
Following the fire manufactures installation instructions, as the fire I installed was second hand I down loaded the information from the net.
Using a metal backing plate to reflect heat into the room recycled if possible
Plaster near to stoves tend to crack using steel to back the heater warms quickly and radiates the heat into the room.
Using stone for the hearth would be expensive how ever a much cheaper stone dust composite would be used.
Using recycled timber for the surround
Sourcing timber is almost a religion in my local group skips, schools and pubs if we see it we ask and most of the time it’s a win win situation. I will be using old science worktops from a local school made from teak to make the fire surround.
The design included
- Learning from the lessons of the back room fire project
- Working within the existing and chimney constraints
- Using regulation and guidelines for fire installation
- Following the fire manufactures installation instructions
- Using a metal backing to reflect heat into the room recycled if possible
- Using stone for the hearth
- Using recycled timber for the surround
Working within the existing and chimney constraints
The chimney is fixed and allows for little adjustment on first inspection some alterations have been made which may cause a problems later.
Using regulation and guidelines for fire installation
The guidelines were accessed from the net and a guide produced by The Living woods magazine supplement on heating with wood. The regulation are clear and concise recommending using stove manufactures guidelines and common sense including the requirement for an air vent if the KW out put is over 5KW. The flue must not project more than 50mm over the throat plate to prevent carbon build up which could be a fire risk. The fire should be Defra approved if used in a smokeless zone.
Following the fire manufactures installation instructions, as the fire I installed was second hand I down loaded the information from the net.
Using a metal backing plate to reflect heat into the room recycled if possible
Plaster near to stoves tend to crack using steel to back the heater warms quickly and radiates the heat into the room.
Using stone for the hearth would be expensive how ever a much cheaper stone dust composite would be used.
Using recycled timber for the surround
Sourcing timber is almost a religion in my local group skips, schools and pubs if we see it we ask and most of the time it’s a win win situation. I will be using old science worktops from a local school made from teak to make the fire surround.
Boundaries
The boundaries to this project are to follow all of the regulations and guidelines set by planning and manufacturers. There physical limitations of the site in this case the chimney configuration and the materials to hand.
Resources
Resources using a second hand stove costing £220, which is a less than half the £489 for a new one, kept the cost down. Other recycled materials were steel tubing for the flue from a running machine roller and timber from a school for the fire surround. A new lintel for the fire place opening and re plastering walls. Advise on fire regulations from the internet and guide books.
Analysis
Analysis this is a straight forward project regulations leave
little room to deviate the regulations are clear and justified for safety reasons. The
research and planning are complete the materials are ready, the removal of the
existing fire place however may uncover obstacles unforeseen and adjustments
may be required. The estimated time line for this project is 8 days spread over 4 weekends, including removal of old fire place, installing the lintel, cutting and installing the back plate and flue, installing the hearth and stove constructing the surround.
Implementation
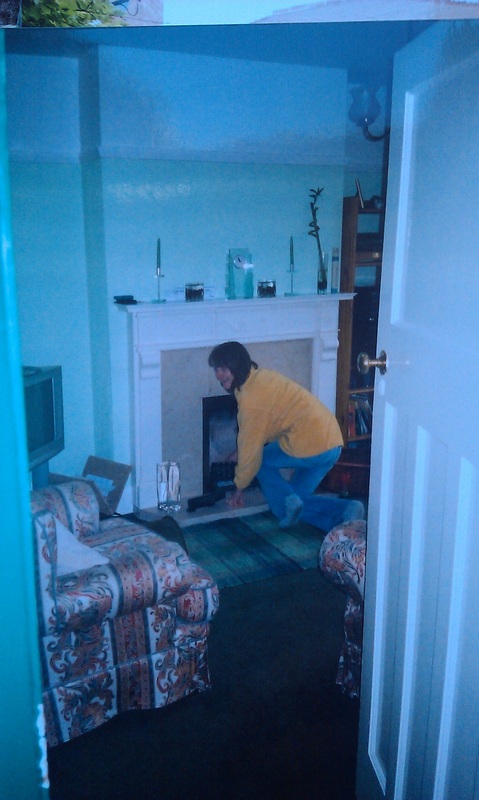
The original fire 2003
The open fire performed well gave good heat output and a central focus to the room. The draw backs were the amount of wood required and the lack of temperature control.
The new design was to open the fire place and install a wood burner to give a controlled heat output and reduced fuel use which in turn lead to refurbishment of the living room.
The new design was to open the fire place and install a wood burner to give a controlled heat output and reduced fuel use which in turn lead to refurbishment of the living room.
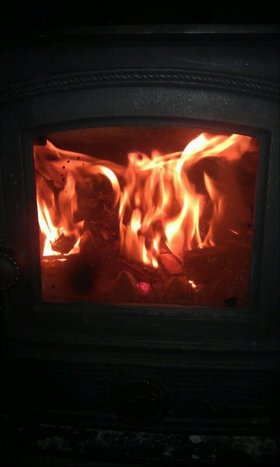
The working fire great
|
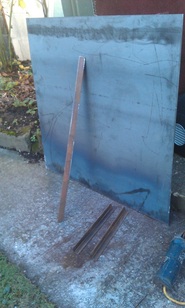
...Measuring and cutting an angle iron bracket ready for welding .The bracket will hold the top plate and allow removal for maintenance.
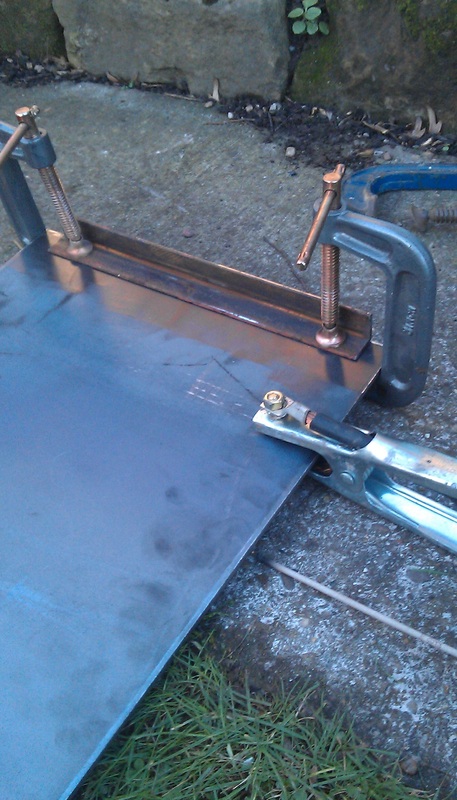
Welding the bracket.
|
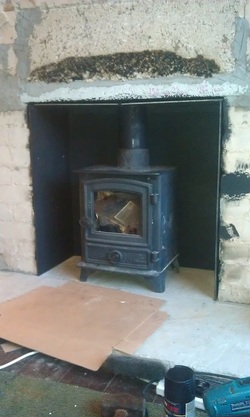
Backing plates installed and painted with high temperature paint. The stove placed for the first fitting and flue alignment . 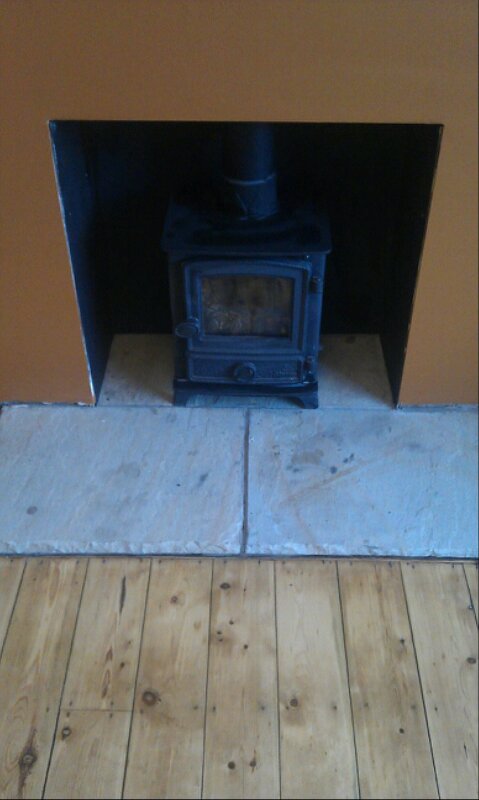
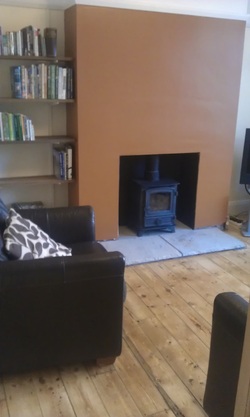
The plastering and painting have been completed the fire surround is under construction. |
The stove project turned into refurbishment of the living room skim plastering the walls, sanding, and polishing the floors that leads to my next project under floor insulation. This was a result of re routing data cables under the floor, I knew that there is a 600mm void under the floors that allow air flow to prevent the wooden joists from rotting The plan was to install a hatch for access to the void for above work and leave access for an under floor cool storage in the future.
.
.
Time process
The estimated time process was in
the analysis however as the project grew the plastering and floor sanding has
drying times between coats, which increased the overall time-line
The break down of tasks
The break down of tasks
- Planning and goals articulation 3 hours
- Survey and analysis 3 hours
- Design and research 2 hours
- Drawing site plan and photos 2 hours
- Problem solving during implementation 4 hours
- Removal of fireplace, hearth and chimney 4 hours
- Installation of a new lintel 5 hours
- Measuring of steel plates collection processing 8 hours
- Installation of the flue 2 hours
- Painting steel and flue 1 hour
- Installation of hearth cutting and setting 3 hours
- Installation and testing of stove 2 hours
- The fire surround 10 not installed (will be in updates)
